


These little angel ornaments are adorable and don’t take very long at all to make. I’m especially proud of the wings on this ornament. There were quite a few remakes to get this shape.
For this pattern I was inspired by the beaded angels I used to make for one of my family members. She adored angels and even though she’s gone now, I wanted to make one more for her.
Abbreviations
- Mc = Magic Circle
- Sc = single crochet
- Slst = slip stitch
Supplies
Angel Ornament Pattern
- White yarn (4)
- Beige yarn (4)
- Purple yarn (4)
- G/ 4.mm hook
- Snips
- Yarn or tapestry needle
- Stitch marker
Work in a spiral unless otherwise stated.

Row 1. In a mc, put 6 sc, tighten circle.
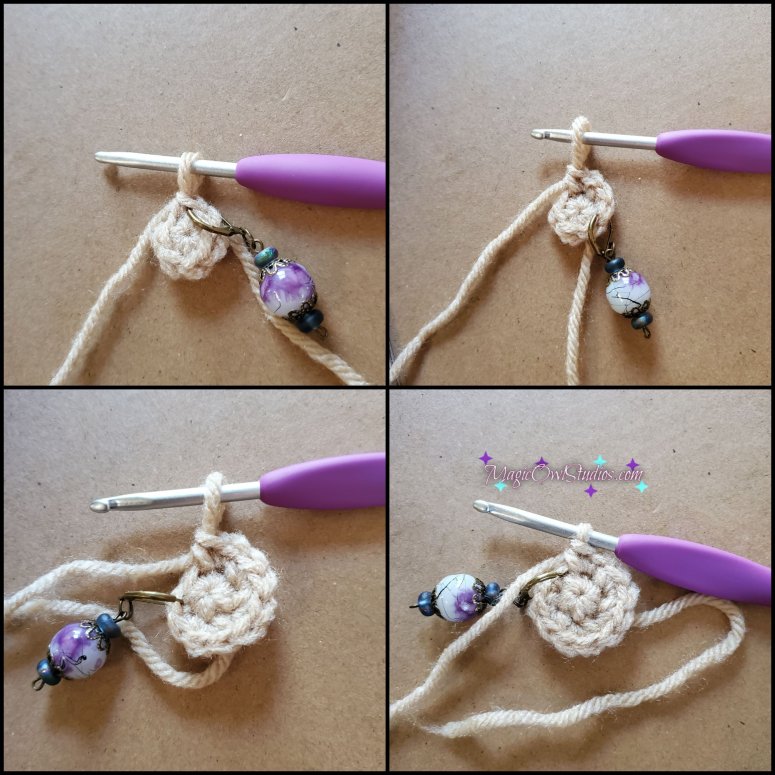
Row 2. Put a sc in the first sc to form a circle. Put a stitch marker in that st, make 1 sc in the same st, put 2 scs in the remaining 5 sts. <12>

Row 3-4. Put 1 sc in each st. <12>

Row 5. Make a decrease in each st, slst to the first st to join the row. <6>
Tip: use an invisible decrease for a cleaner look.

Cut the yarn leaving about a 2 inch tail and tie it off.

Row 6. In the dress color, pull up a loop where you did your slst, ch 1, put 2 scs in the first st, put 2 scs in each st. <12>

Row 7. Put 2 scs in every st. <24>

Round 8 – 13. Put 1 sc in each st, remember to move your stitch marker to the first st of each round.<24>
After your final row, slst to the st with the st marker in it.

Snip your yarn, tie it off and weav in your ends. You can hide it on the inside of the robe.
Wings

Row 1. In a Mc, make 3 sc, ch 4, sc, ch 3, 3 sc, ch 3, pull the circle tail so it’s small, slst to the first sc.

Row 2. Turn, ch 1, 2 hdc, 2 dc, 1 hdc, put 1 dc into the next ch 3 space, put 1 trc, ch 5, slst to the first ch, 1 trc, 1 dc.

Round 2 continued. Picot, 1 dc, 1 hdc, Slst in to the first of the 3 sc, ch 1, slst to last of the 3 sc, hdc in the next ch 3 space, 1 dc, picot, 1 dc, 1 trc, picot (5ch).

Row 2 continued. 1 trc, 1 dc, put 1 hdc in to the next ch 3 space, 2 dc, 2 hdc, slst to the sc tie off.

Attach the wings to the robe using your tail and a yarn needle, small crochet hook, or latch hook.
You can stuff the head with a bit of stuffing or a cotton ball if you want it to maintain its round shape.
Extras tips
These angels are easily customized, you can change any of the colors to fit the skin tone or robe color you like.
You don’t have to use them as ornaments, they can also be placed on mantels or on any flat surface.
If you want you can also embroider the face or a design on the robe.
This pattern and all it’s photos are copyrighted by Becka Hons. Please do not sell my pattern or it’s photos on any platform. You can sell the finished work, but please give me credit as the designer and link back to me if someone asks for the pattern.
I hope you liked this pattern and tutorial! If you found it helpful, please show your support by liking this post and following my blog, so you’re alerted when ever I make a new post. You can also sign up for The Crocheting Owl Monthly Newsletter for free patterns, updates, yarny bonuses and more!